This guide will walk you through setting up OPNsense with an Airtel connection with a dynamic IP. If you have a static IP, step 6 will vary. I do not have a static IP, so I am not sure of the specifics.
For the sake of simplicity, I will be referring to the Airtel’s all in one router as “Airtel’s router”.
Pre-Requisites
- OPNsense Installation: This guide will NOT walk through how to install OPNsense. Refer to the official documentation or other guides for installation instructions
- PPPoE credentials
- You can follow these steps to get your credentials
- WAN VLAN ID/ tag. Find this information on the WAN page of Airtel’s router
Getting PPPoE credentials
Using the Airtel Thanks app:
- Go to the “services” page
- Tap on your broadband connection or if you have a Airtel Black connection then
- Go to the “Airtel Black” page
- Navigate to “Manage connection”
- Tap on “Broadband/ Wi-Fi”
- Scroll down till you see Account info. Note down your DSL Number and Account Number
Your PPPoE username is <DSL_number>@airtelbroadband.in, and your PPPoE password is your account number.
Alternatively, you can obtain your username from the WAN section in your Airtel-provided router.
Airtel router and other basic configuration
- Login to the Airtel router and configure one port in bridge mode
- Connect that port to the WAN port of OPNsense
- Connect the LAN port of OPNsense to a switch
- Access OPNsense using its IP address
If you are wondering how all the connections would look like, you can take a look at the network layout diagram I posted in my homelab roundup blog. (ONT is basically Airtel’s router)
OPNsense configuration
- Log into OPNsense using your username and password set during installation
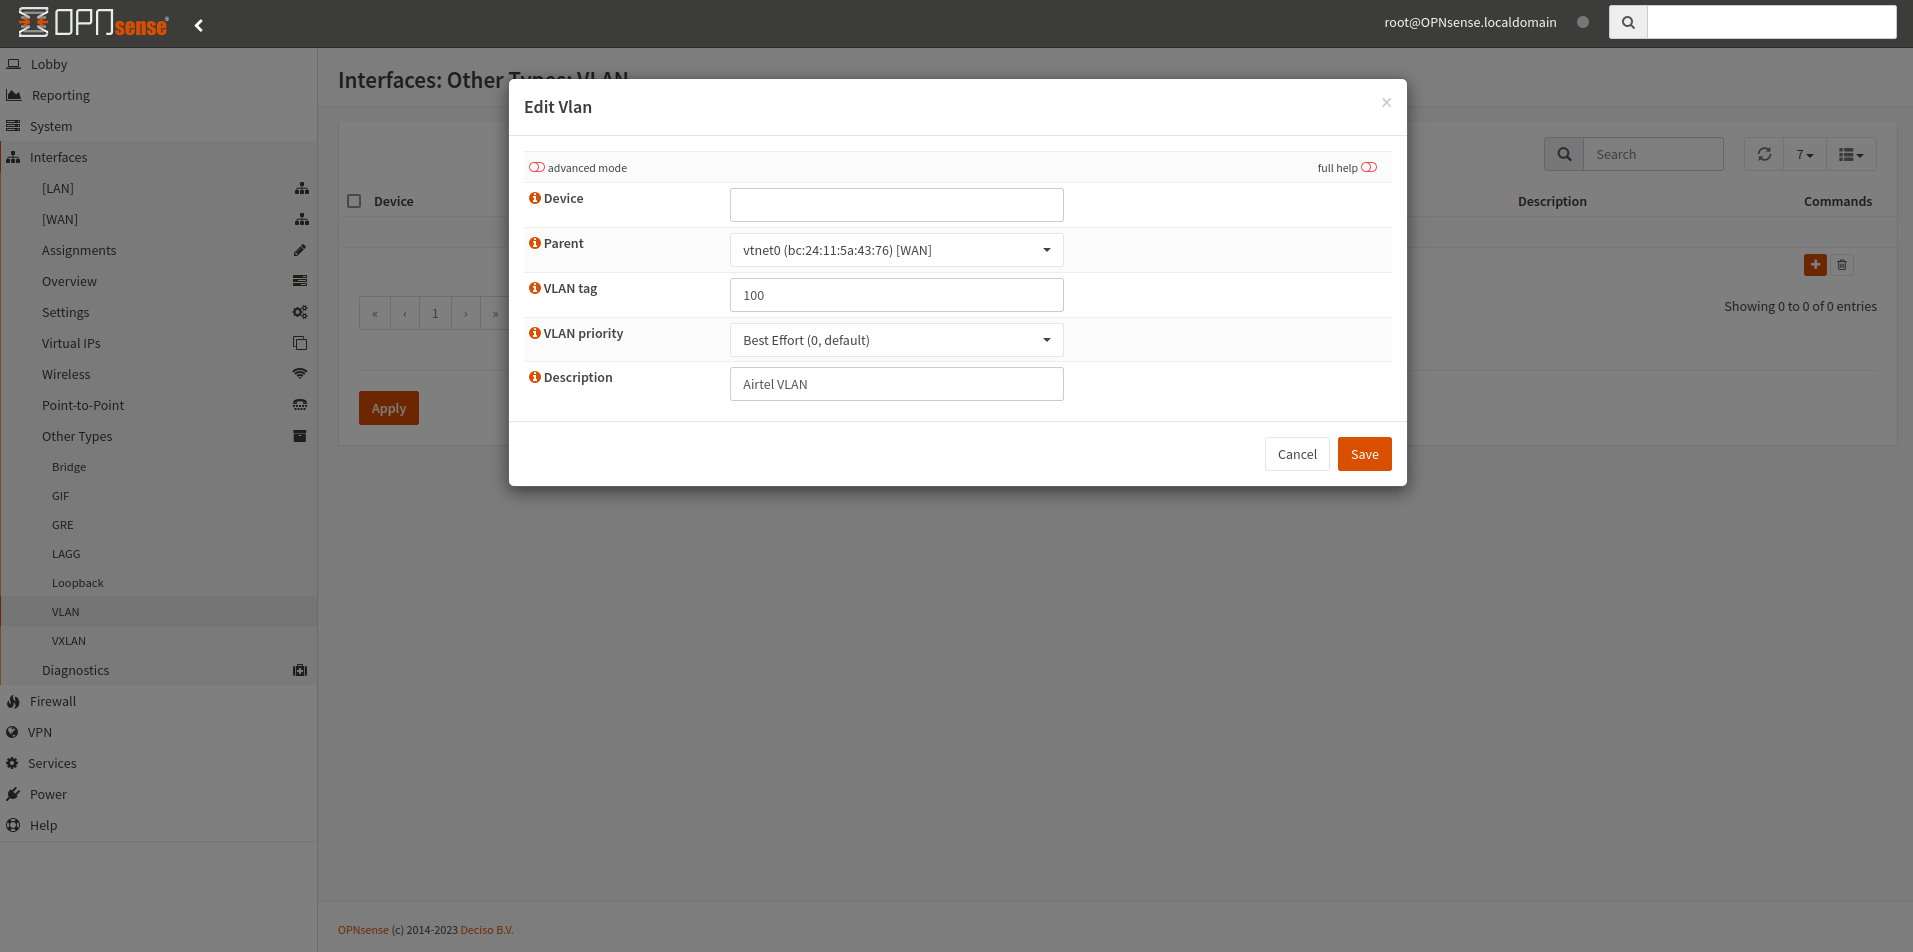
- Go to Interfaces > Other types > VLAN
- Click on the plus (+) icon on the right side
- Enter a device name (optional). OPNsense will generate a name if left blank
- Set the “Parent” to your WAN interface
- Enter the VLAN ID you noted earlier from the Airtel router in the “VLAN tag” field
- Set VLAN priority to “Best Effort” (default).
- Add a description (optional)
- Click on “Save”
- Click on “Apply” to apply the changes

- Navigate to the Assignment tab under Interfaces
- Select the newly created VLAN interface in the WAN interface dropdown and click on “Save”
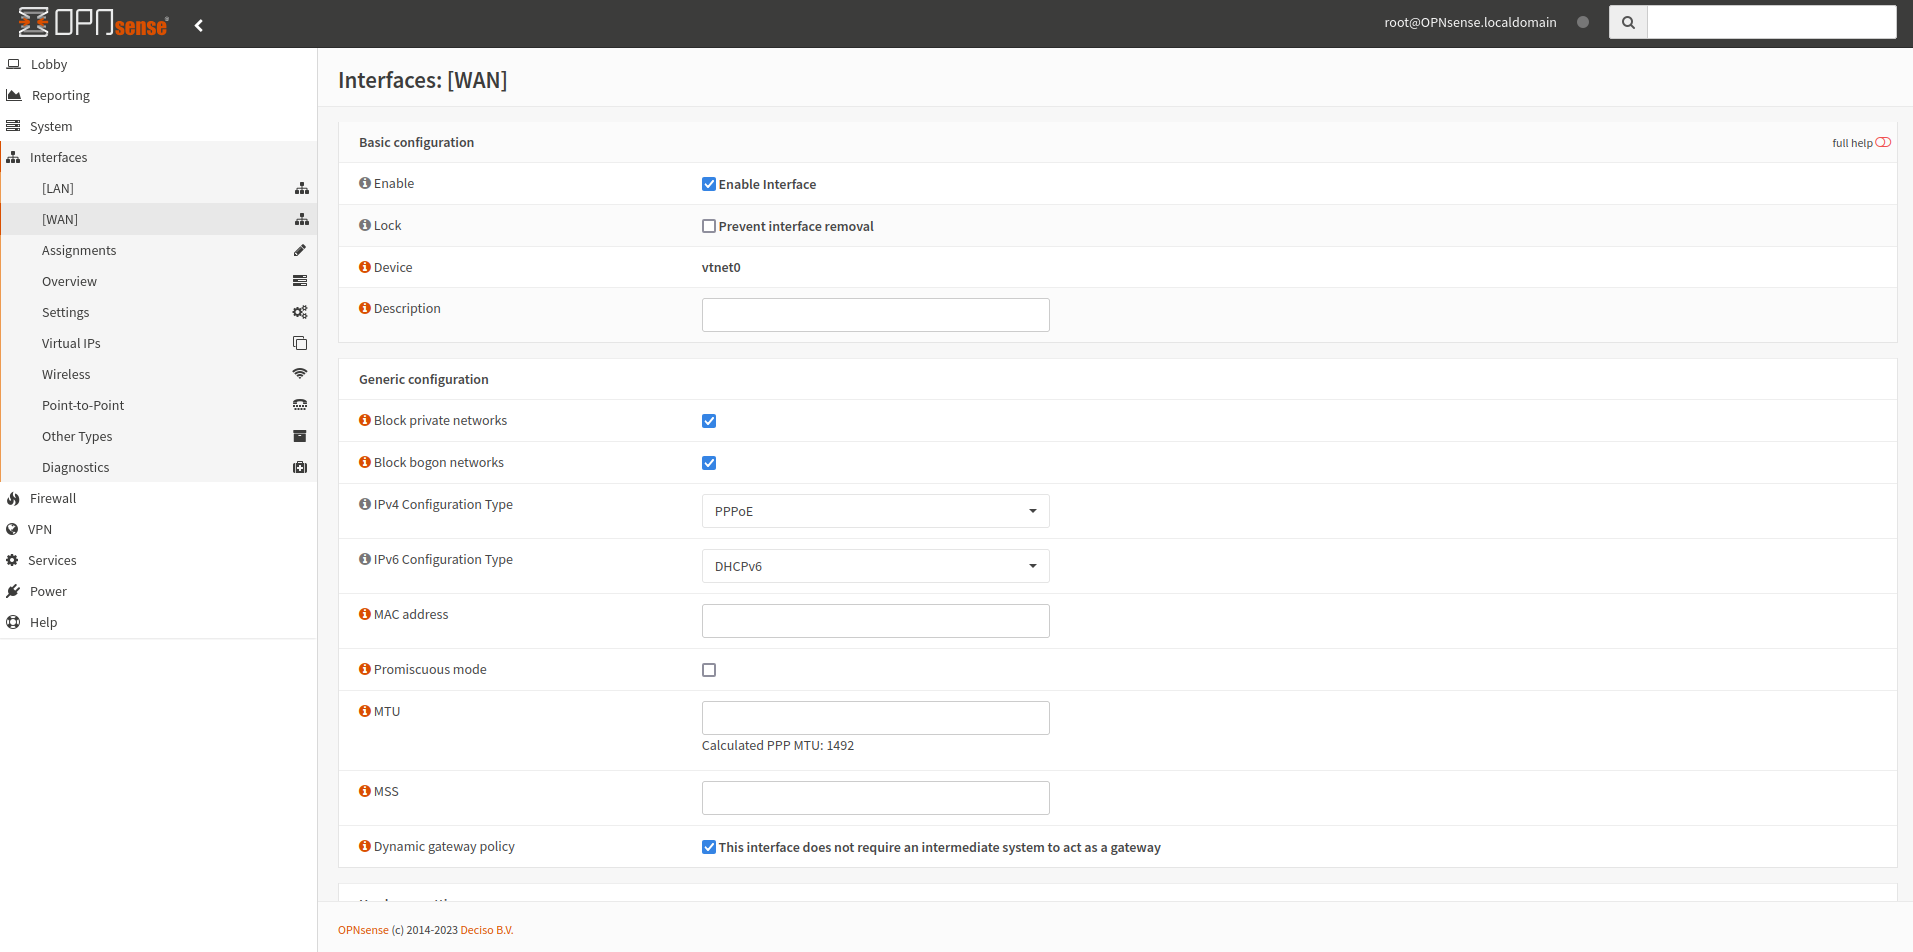
- Go to WAN interface (Interfaces > [WAN])
- In the Generic configuration section
- Select PPPoE in the IPv4 Configuration Type dropdown
- Select DHCPv6 in the IPv6 Configuration Type dropdown (if you want IPv6)
- Enable Dynamic Gateway Policy
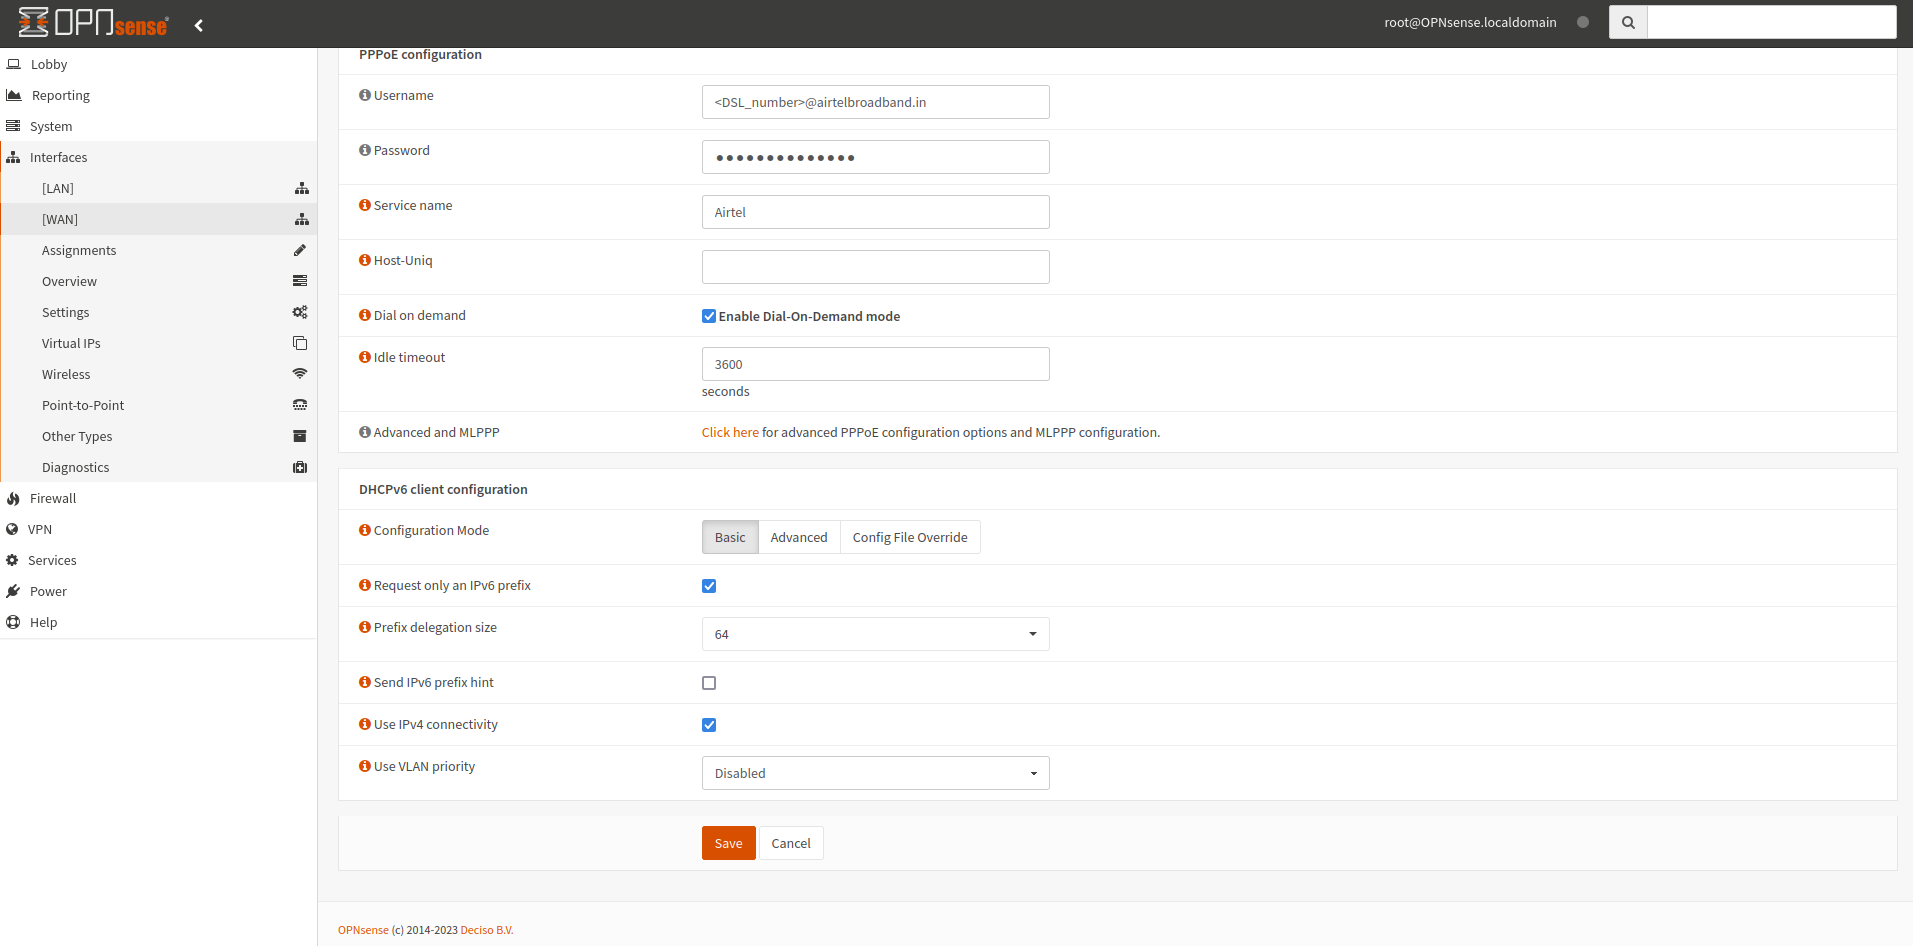
- Scroll down to the PPPoE configuration section and enter the details as follows:
PPPoE username: Your <DSL_number>@airtelbroadband.inPPPoE password: Account numberPPPoE service name:Airtel- Enable Dial on demand
PPPoE idle timeout:3600
- See IPv6 configuration section, if you want to setup IPv6
- Click on “Save” and “Apply changes” (a banner will pop up on the top)
- In the Generic configuration section


- You should now have internet access
Enabling DHCP
To enable DHCP, go to Services > DHCPv4 > [LAN]:
- Check the Enable checkbox
- Click on “Save”
IPv6 configuration
To obtain an IPv6 address:
- Go to [WAN] interface and scroll down to DHCPv6 client configuration
- Enable Use IPv4 connectivity
- Set Prefix delegation size to
64 - Enable Request prefix only
- Click on “Save”
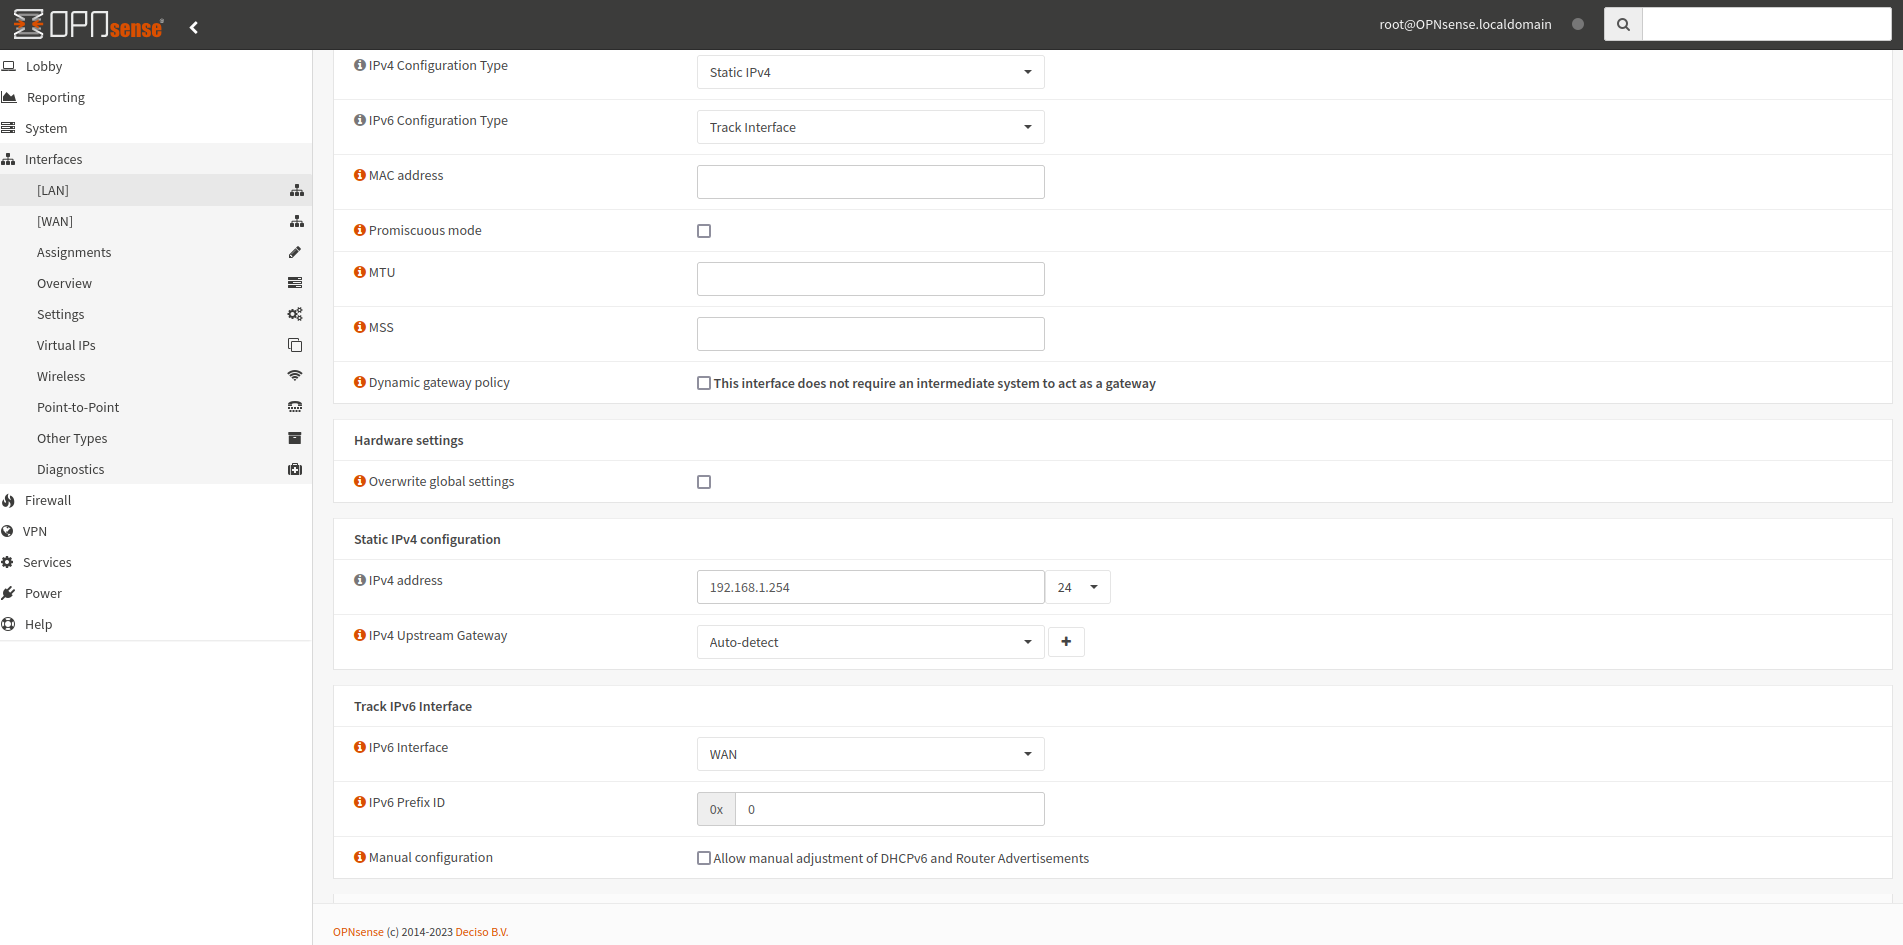
- Go to the [LAN] interface
- In the Generic configuration section
- Select Track interface in the IPv6 Configuration Type dropdown
- Scroll down to the Track IPv6 Interface section
- Select WAN from the IPv6 Interface dropdown
- Click on “Save”
- In the Generic configuration section

This is how you can use OPNsense with an Airtel connection with a dynamic IP.